In the dynamic world of eCommerce, finding the right platform to showcase and sell your products is crucial for business growth. One of the retail giants, Walmart offers an extensive online marketplace known as Walmart Seller Center, providing sellers with a vast audience and unparalleled opportunities. If you’re eager to tap into this expansive market, you’re in the right place.
If you’re interested in discovering all you can about Walmart seller center registration and application procedures, this six-step guide will help you.
What is Walmart Marketplace?
Walmart Marketplace is an online platform enabling third-party sellers to offer their products alongside Walmart’s inventory. Like eBay or third-party sellers on Amazon, it allows suppliers to reach a broader audience and utilize top-notch online selling tools. Since 2009, Walmart Marketplace has facilitated the exposure of various products to Walmart customers, providing a valuable entry point for sellers aiming to place their products in Walmart’s physical stores.
What are the requirements for joining the Walmart Seller Center marketplace?
If you’re considering becoming a part of Walmart Marketplace but need help figuring out where to start, we’ve streamlined the application process to make it simple and convenient. Our goal is to assist you in swiftly offering products to customers.
Before initiating the application, it’s important to note the following minimum qualifications for joining Walmart Marketplace:
- Business Tax ID(s) (SSN not accepted) or Business License Number
- Supporting documents validating your business name and address
- Demonstrated history of success in the marketplace or eCommerce
- Products with GTIN/UPC GS1 Company Prefix Numbers
- A product catalog that adheres to Walmart’s Prohibited Products Policy
- Ability to fulfill orders through Walmart Fulfillment Services (WFS) or another B2C U.S. warehouse with returns capability
If your offerings provide worth to buyers at a reasonable price, you’re a perfect fit with Walmart. Check out the steps in depth when you are ready to register. It’s all in your Walmart application form.
In these simple steps, how can you sell your product on Walmart.com?
After you’ve learned about the requirements for becoming a seller on Walmart and have met these requirements, you’re now able to take the time to review the six steps.
After you’ve learned about the requirements for becoming a seller on Walmart and have met these requirements, you’re now able to take the time to review the six steps.
There are two options to begin your selling journey at Walmart. You have the option to
- You can either get invited by Walmart to the market, or
- By applying to become a seller. For most sellers’ scenarios, B is the best option; however, when you’ve been given an invitation, you may skip step 2, which is explained in the following section.
Step 1- Apply to be the first Walmart Marketplace Seller
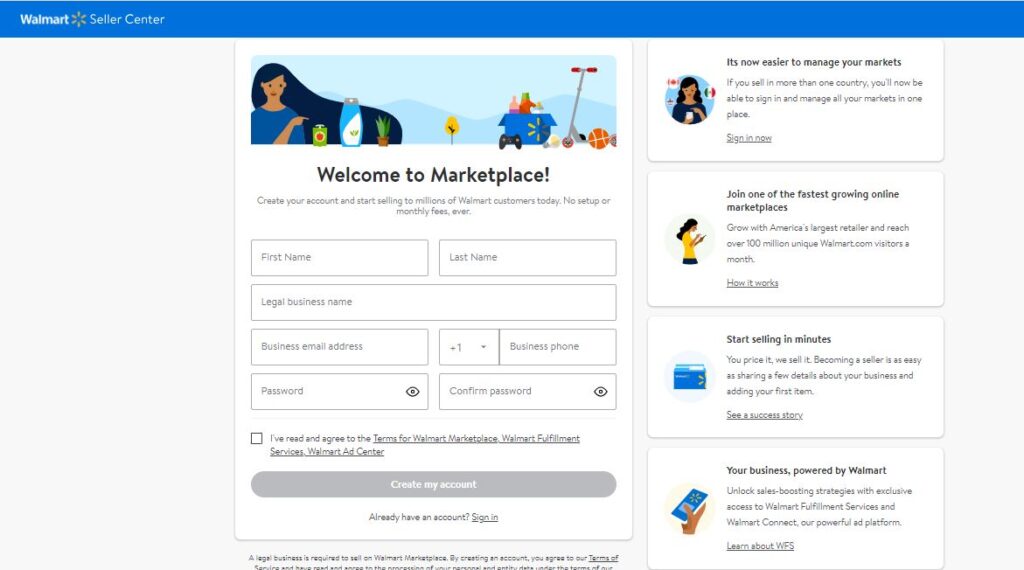
Register for a seller account or log in if you already have one. Visit the official Walmart Seller Center website at https://seller.walmart.com. Create a new seller account by clicking “Sign Up” or log in with existing credentials if you already have an account. Fill in your primary business details and set up your login and password.
Step 2- Review Minimum Qualifications:
Verify that you satisfy Walmart’s minimum requirements for sellers, which generally consist of possessing a Business Tax ID or Business Licence Number, providing documentation for business verification, demonstrating a track record of the thriving marketplace or eCommerce operations, offering products with GTIN/UPC GS1 Company Prefix Numbers, and adhering to Walmart’s Prohibited Products Policy.
Step 3- Fill out the application:
To finish the application procedure, adhere to the instructions. This may involve providing further information about your company, accepting the terms and conditions, and proving your identification. Where you input details about your business managers, including their email addresses, overseeing various departments like finance and customer service.
Step 4- Wait for Approval:
Once you have submitted your application, you must wait for Walmart to examine and approve your seller account. You can expect to get emails informing you of the current status of your application.
Step 1: Apply to start Walmart’s onboarding process, and then seek approval
Step 5- Set Up Your Seller Profile:
After approval, access your Walmart Seller Center account and establish your seller profile. This involves configuring shipping settings, inputting business details, and uploading your product catalog. Upon successful business verification, proceed to the next step, “Get Paid,” where you can enter your payment information using either Hyperwallet or Payoneer.
Step 6- List your products:
You can begin listing your products once you have completed the Seller Profile setup process. Proceed to add the products you want to sell on Walmart Marketplace using different integration methods.
- API:
Opt for the API integration method if your team possesses programming expertise, especially when configuring a substantial catalog on Walmart. - Bulk Upload
Create Excel spreadsheets containing your items for a bulk upload to Walmart. This option is ideal for sellers with a more limited catalog. - Single Item:
Enter your product details directly into the Seller Center user interface with the single-item method. This is recommended for setting up your initial items or if your product assortment is limited. - Solution Provider:
Consider working with one of Walmart’s approved solution providers who can assist in managing your listings on Walmart Marketplace. This option is suitable for those seeking external support for their listings.
Step 7- Upload Inventory:
To refresh inventory, use the inventory spec and click the bulk updates tab under items and inventory.
Choose bulk inventory update from the select spec option in the template, then click download.
Within Excel, using the Excel template, you fill in the two fields:
- The SKUs you are changing.
- The latest quantity(stock) is for SKU.
Then, save the document.
Upload Completed Spec
Go back to the bulk updates page and upload the finalized file.
Then, select bulk inventory update from the select spec menu.
After that, pick the proper distribution facilities from the list and press the submit button.
Step 8- Ready to Launch:
This step is to meet the following requirements:
- You must upload at least 10% of the products in your catalog or 1,000 (whichever number is lower).
- A minimum of 95% of your goods need to be classified correctly.
Once you’ve completed all steps after you have completed steps, hit ‘ Ready to Launch.
Best practices for selling successfully on Walmart
To achieve success as a vendor on Walmart Marketplace, one must adhere to best practices and implement effective strategies. The following advice will assist you in achieving greater success:
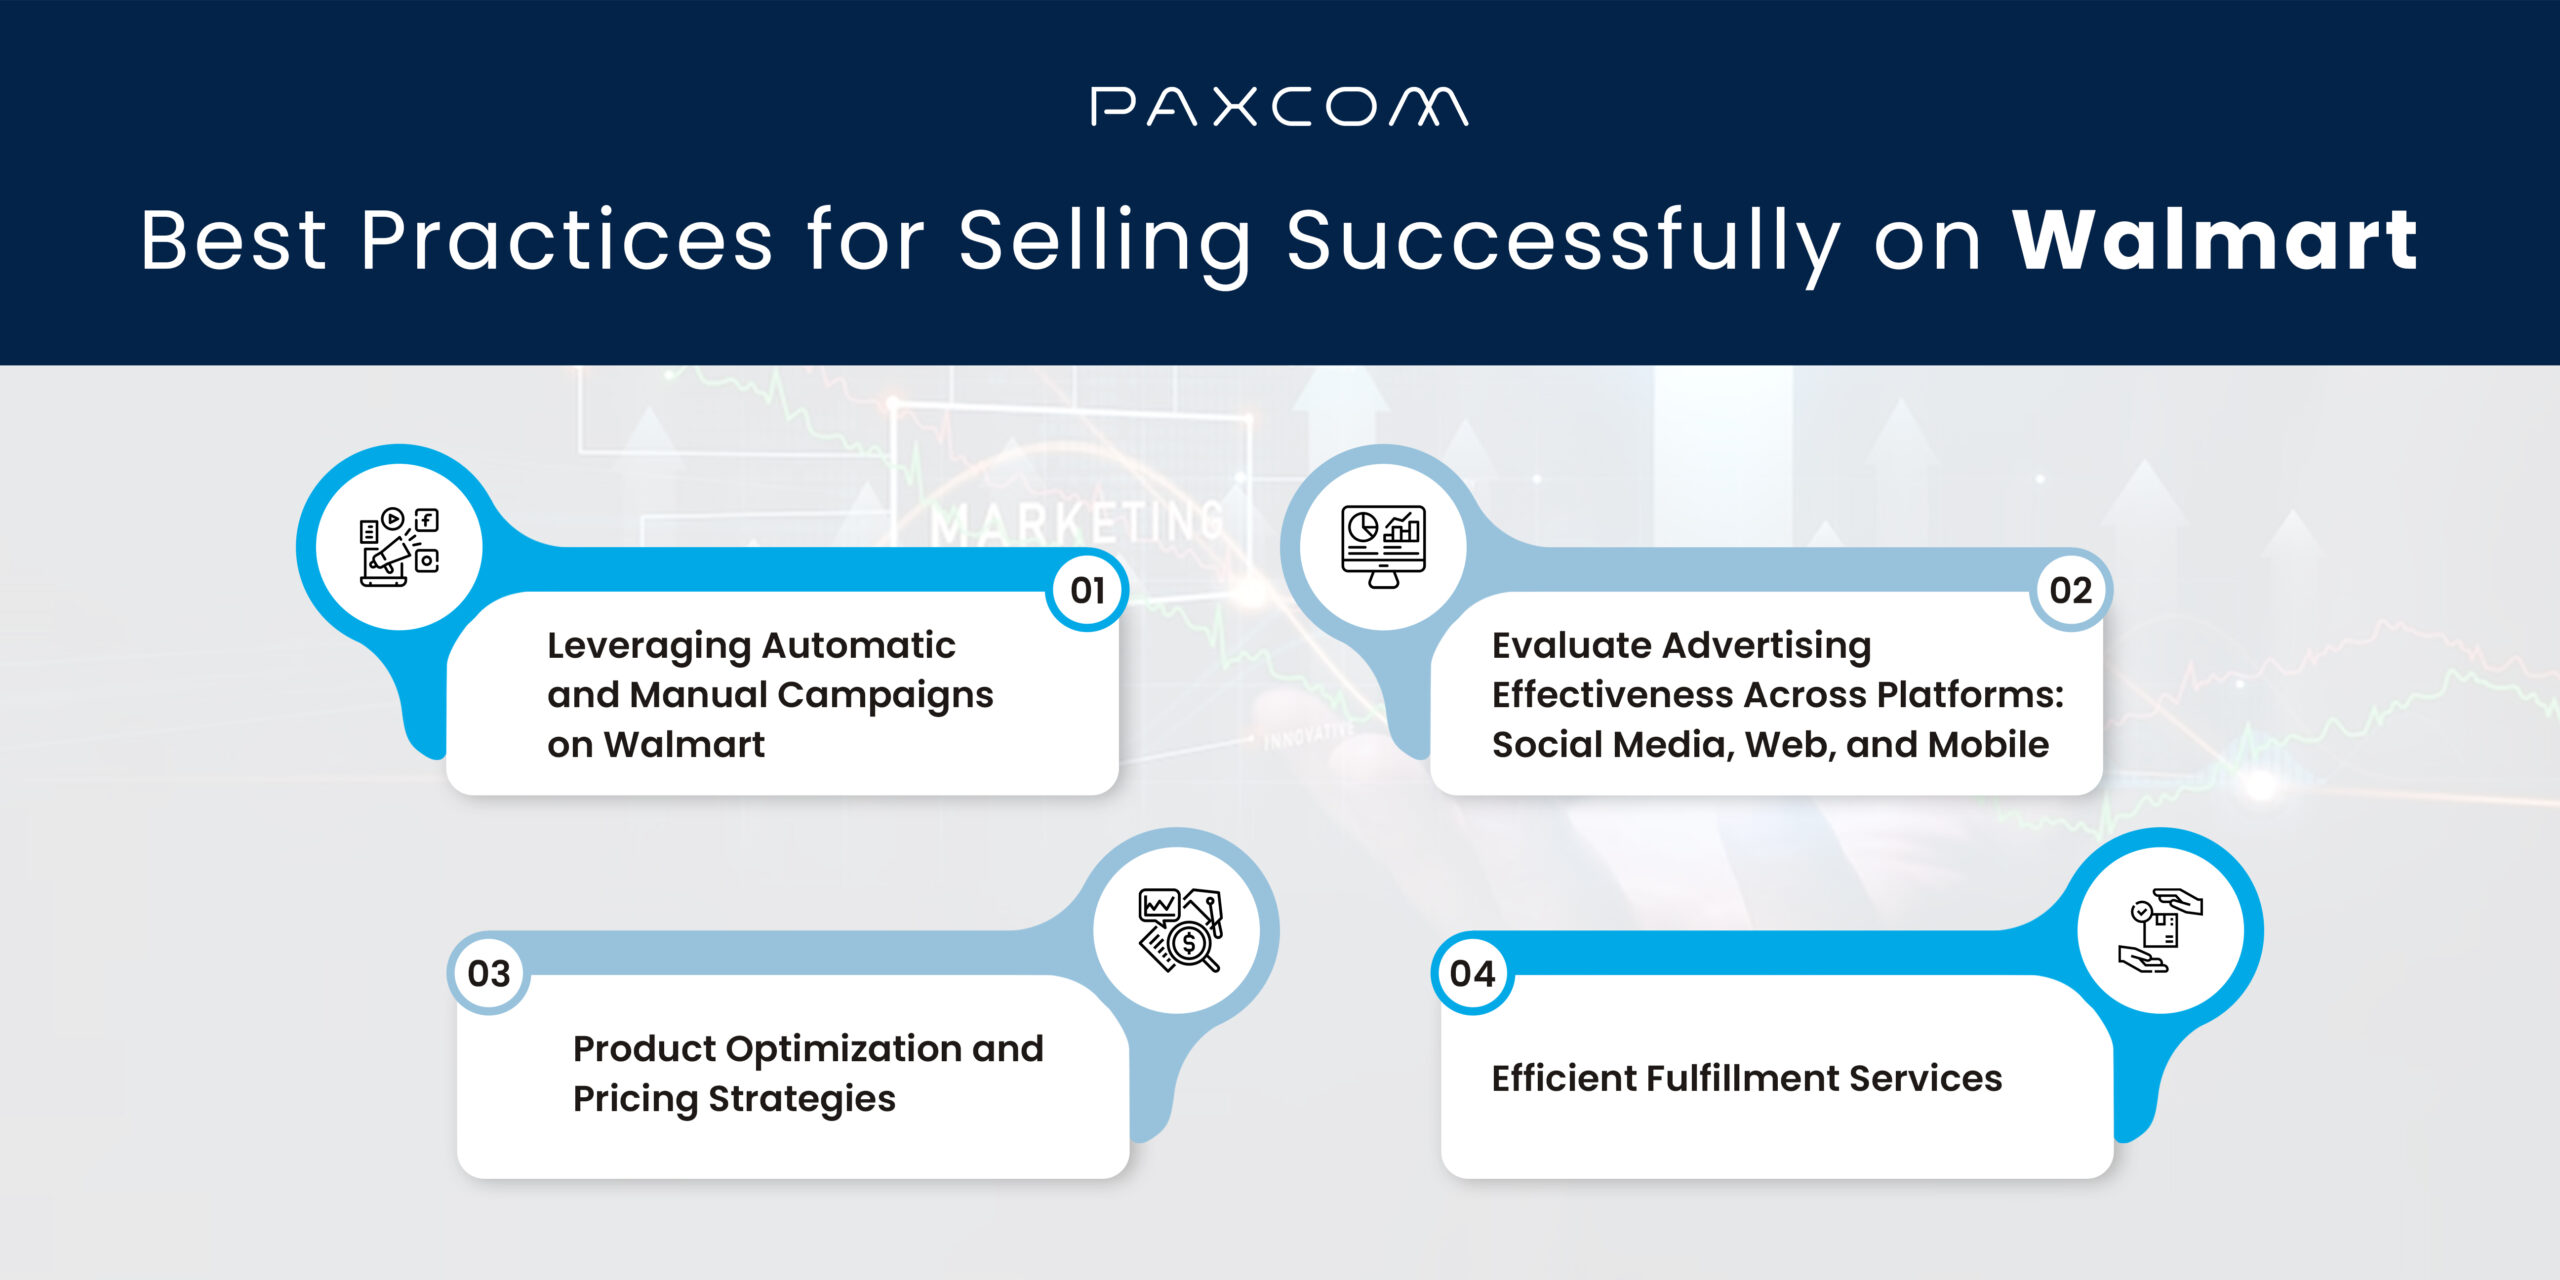
- Leveraging Automatic and Manual Campaigns on Walmart:
Walmart offers two types of Sponsored Product ad campaigns: automatic and manual.
Automatic campaigns utilize Walmart’s algorithm to select relevant keywords and ad placements, making them ideal for new brands without extensive keyword research.
Manual campaigns allow advertisers to choose specific keywords and match types, offering more flexibility and control over advertising strategy.
A combination of both campaign types is recommended for optimal advertising results on Walmart
- Evaluate Advertising Effectiveness Across Platforms: Social Media, Web, and Mobile:
To gauge ad performance across Walmart platforms, analyze data from mobile, desktop, and social media channels. Each platform targets diverse audiences, requiring tailored strategies. For instance, social media, a top source of shopping inspiration for 97% of Gen Z, is ideal for product discovery. Utilize Walmart display campaigns on social platforms to engage this audience. If one platform underperforms, explore alternatives until finding success.
- Product Optimization and Pricing Strategies:
Regularly review product performance data to identify best-selling items and prioritize them in marketing efforts. Implement dynamic pricing strategies to stay competitive and maximize profitability. Offer promotions, discounts, and bundle deals to incentivize purchases and attract customers.
- Efficient Fulfillment Services:
Enroll in Walmart Fulfillment Services (WFS) to benefit from fast and reliable order processing, shipping, and customer support. Maintain adequate inventory levels to prevent stockouts and fulfill orders promptly to maintain high seller ratings. Utilize Walmart’s fulfillment network strategically to minimize shipping costs and delivery times for customers.
Strategies for Selling Quickly on Walmart Marketplace
- Establish credibility by showcasing a history of success in the marketplace or eCommerce sphere. Walmart prioritizes credible sellers to ensure a positive shopping experience for customers.
- Review and ensure none of your products violate Walmart Marketplace’s Prohibited Products Policy. Items such as hazardous materials, alcohol, and offensive products can lead to application denial.
- Provide comprehensive information about your business upfront to streamline the application process and avoid unnecessary delays.
- Familiarize yourself with Walmart’s Performance Standards and Policies to ensure compliance with all marketplace rules and guidelines. This knowledge will facilitate a smoother application and approval process.
Walmart Seller Center Updates 2024
- Walmart recently introduced a dedicated registration page for Indian sellers to join its marketplace, accompanied by a global seller meet. The initiative aims to provide insights into consumer trends, assist with onboarding, and facilitate catalog setup for prospective sellers, enhancing their selling experience on the platform.
- Walmart is democratizing AI-powered logistics technology with Route Optimization, now available to businesses as a SaaS solution. This innovative tool enhances efficiency by planning truck routes, optimizing trailer packing, and ensuring timely deliveries despite external factors. Additionally, it strategically plans inventory pickups for greener operations. Walmart’s commitment to innovation is evident with Route Optimization, its latest addition to a decade-long track record of pioneering omnichannel solutions like Store Assist for local fulfillment.
Conclusion
The process for application and onboarding at Walmart is a challenge for sellers. But with the help of a solution supplier and an experienced integrated team, you can launch your store within minutes.
These steps will answer any questions about Walmart’s registration and onboarding process. If you’re in doubt about how to start selling efficiently on Walmart.com or how to scale your business in the US market, kindly connect with us at info@paxcom.net or request a consultation call here.